Why a clean scan does not mean a clean show
Most people meet this problem at the worst moment. Soundcheck sounded fine, the scan picked open channels, and then a vocal mic starts crackling or dropping out halfway through the set. One community anecdote on r/livesound describes this pattern. A user in Berkeley reported intermittent static on all four handhelds even after scanning for channels [R1]. That post is a single excerpted report, not evidence of how common the problem is. Still, it shows why a scan alone is not a diagnosis.
The useful habit is to split the symptom into two questions. Is the radio link between transmitter and receiver failing? Or is the radio link fine while something in the audio chain fails? Shure's troubleshooting guidance recommends separating RF faults from audio faults by isolating systems and watching the receiver's indicators [S1]. Everything else in this guide builds on that split. Treating every dropout as interference wastes time when the real culprit may be a loose XLR cable or a dying battery.
- RF fault: the link itself weakens, drops or picks up interference.
- Audio fault: the link holds but the sound is lost, distorted or noisy somewhere else.
- Mixed fault: a weak link and a marginal battery or connector can both contribute.
Log the RF meter, audio meter and battery state at the moment of failure
Receivers usually show some combination of an RF level or antenna indicator, an audio level meter, and transmitter battery status. Exactly what yours displays depends on the model, so check the manual for what each light or bar means. The key is timing. Glancing at the receiver five minutes later tells you very little. Assign someone to watch the receiver during rehearsal, or film the front panel with a phone while the performer walks the stage.
When the dropout happens, note what changed. If the RF indicator collapsed or flickered while audio vanished, the link is the likely suspect. If the RF indicator stayed steady while the audio meter dropped or showed odd spikes, look downstream or at the capsule and transmitter audio path. A battery reading that sagged just before the problem points somewhere else again. Write down the time, the performer's position on stage, the channel, and what each indicator showed.
- Record time, stage position, channel and frequency for each event.
- Note the RF indicator, audio meter and battery reading together.
- Use phone video of the receiver if no one can watch it live.
Test one transmitter and receiver pair with known-good wired connections
With four or more systems running, it is hard to tell which one causes trouble or whether they are affecting each other. Power down everything except one transmitter and its matched receiver. Run that receiver's output into the console through a cable and input channel you have already confirmed with a wired microphone. Now you have one variable path instead of a dozen.
If that single pair behaves well across the stage, bring the others back one at a time and listen for when the problem returns. That approach fits the isolation principle in Shure's guidance [S1]. If the lone pair still drops out, you have narrowed the search to that transmitter, that receiver, its antennas, or the immediate environment. That is a much smaller problem to solve.
Swap one component at a time
Once one pair is misbehaving, change a single element and retest before touching anything else. Try fresh batteries or a fully charged pack from a known-good set. Then try a different transmitter tuned to the same receiver, if your system allows it. Next try a different receiver, then different antenna cables, and finally a different output cable and console input. If you change three things at once and the problem disappears, you will not know which one fixed it, and the fault may return next week.
Keep a simple table as you go: what you swapped, what you observed, and whether the fault followed the part. A fault that follows a transmitter to a different receiver suggests the transmitter. A fault that stays with one receiver whatever transmitter you use points at the receiver or its antennas. A fault that disappears when you change the output cable was never a wireless problem.
- Batteries first: they are cheap and quick to rule out.
- Transmitter, then receiver, then antenna cabling, then audio output path.
- Retest at the same stage positions each time so results are comparable.
Coordinate all microphones and in-ear monitors together
Many operators scan for open channels and assign each microphone separately. Your own transmitters can interact with one another and with in-ear monitor transmitters, producing interference on frequencies that looked empty during the scan. Many systems include a group or coordination feature intended to reduce these combinations. The wireless microphone frequency scan is a starting point, not a guarantee, because the environment can change after you run it.
Treat every wireless device in your rig as one plan: handhelds, bodypacks, in-ear monitors, instrument packs, and any wireless intercom. Scan with all your own transmitters off, then coordinate the full set using the manufacturer's tools or published compatible groups. Rescan on show day if you can, because neighboring venues, broadcast activity and other productions can change the picture. Expect to leave a backup frequency in reserve.
Check line of sight, antennas and overload, not just weak signal
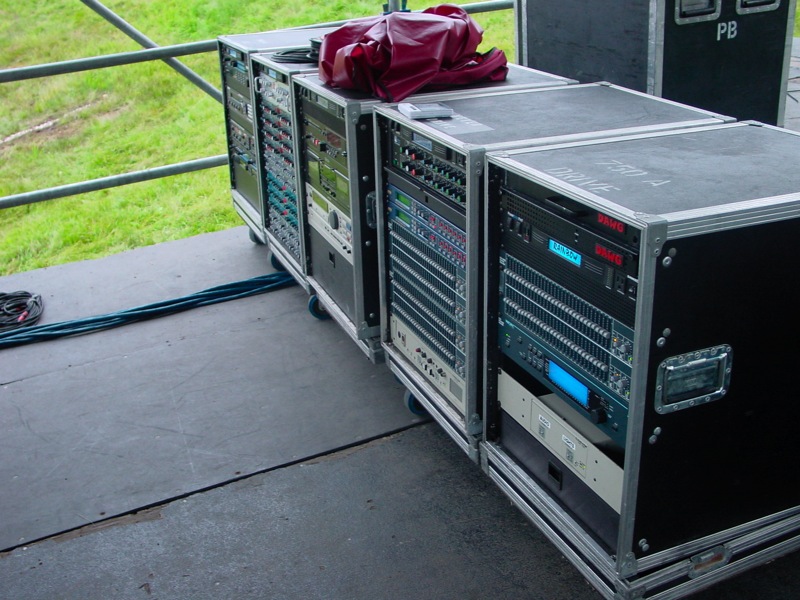
Dropouts are not always caused by too little signal. Performers' bodies, metal set pieces, LED walls, and receivers buried in a rack behind steel can all block or reflect the signal. Loose, damaged or wrongly mounted antennas and cables are common and easy to miss. Look for clear line of sight from the performance area to the receiving antennas, and follow the manufacturer's guidance on antenna placement and spacing.
The opposite problem matters too. A transmitter held very close to a receiving antenna can overload the receiver, and very strong nearby signals can cause trouble even when nothing appears weak. If dropouts happen when a performer walks right up to the rack or the side-stage position, overload is worth checking. For remote antennas, active distribution, or antennas mounted on trusses or high points, hand the work to the venue's technical staff or a qualified rigger. Do not climb or hang equipment yourself.
- Inspect antenna connectors and cables for damage or looseness.
- Note whether dropouts cluster at one area of the stage.
- Leave antenna mounting at height to qualified venue or rigging staff.
Verify the exact tuning band and lawful local operation
Before retuning, confirm what band your equipment actually covers and whether operating there is permitted where you are performing. In the United States, the FCC document DA 17-709 relates to the 600 MHz transition. It reflects a July 2020 deadline for wireless microphones to stop operating in the 600 MHz service band [S2]. That document is historical and is not a complete current frequency chart [S2]. Check current FCC information or the manufacturer's US documentation for today's rules, and consult the relevant national authority if you tour outside the US.
This matters for diagnosis and for buying. Older or imported systems may tune to ranges that are now unavailable or unsuitable in the US. A seller's assurance that a system works anywhere does not prove it. Do not increase transmitter power, modify equipment, or enter arbitrary frequencies found online. Those steps can cause interference and break the rules, and they will not fix a coordination problem.
- Red flag: a used listing that omits the model's band or frequency range.
- Red flag: claims that a system is legal in every country or band.
- Verify: read the band code on the device label and match it against the manufacturer's documentation.
- Verify: ask the seller for the exact model number and band variant before paying.
Hypothetical worked example
This is an invented scenario for illustration. A church band runs four handhelds and two in-ear monitor packs. Vocal three drops out twice during Sunday rehearsal, even though the operator scanned that morning. The operator films the receivers during a second run-through. At the dropout, the RF indicator on receiver three falls to nothing while the battery shows full. The other receivers stay steady. That suggests an RF fault rather than an audio fault.
Next, the operator powers everything else off. Receiver three now works across the stage, so the problem appears only when the other systems are running. Rebuilding the setup one device at a time, the dropouts return when one in-ear transmitter is switched on. The operator coordinates all six devices together, picks a compatible group, and rescans. The dropouts stop. As a precaution, the operator also tightens a loose antenna cable found during the inspection.
Prepare a wired fallback and know when to escalate
Even good diagnosis cannot remove every risk during a live show. Keep a wired microphone already patched to a labeled, tested console channel next to each critical wireless position. Then a dropout means a quick handoff rather than dead air. Agree with performers ahead of time on who grabs the backup and when.
Escalate when your log shows a fault that follows a single transmitter or receiver after batteries and cables are ruled out. That points to hardware, and the manufacturer's support team will want your recorded observations, model and band, and firmware version. Call in a professional frequency coordinator for dense events, multi-venue sites, or broadcast environments. Ask the venue or local authority when legal operation is unclear. Electrical or power-distribution concerns at the rack belong to a qualified electrician or the venue's technical staff.
- Contact manufacturer support with logs, model, band and firmware.
- Hire a frequency coordinator for large or congested productions.
- Refer power or electrical issues to qualified venue staff.
Your next steps
- Film or watch receiver RF, audio and battery indicators during rehearsal and note each dropout.
- Power down all but one pair and route it through a channel proven with a wired mic.
- Swap batteries, transmitter, receiver, antenna cabling and output cable one at a time, logging each result.
- Coordinate all microphones and in-ear monitors as one plan and rescan on show day.
- Inspect antenna connections and line of sight, and watch for dropouts near the receiver that may indicate overload.
- Confirm your device's band code and check current FCC or local authority guidance before retuning.
- Patch and label a tested wired backup microphone for each critical position.
- Send failure logs, model, band and firmware details to manufacturer support if a fault follows one component.
Questions that come up next
Why does my wireless mic cut out even after a frequency scan?
A scan captures the RF environment only at that moment, and usually without your own transmitters running. Interaction among your own mics and in-ear monitors, new nearby signals, blocked line of sight, faulty antennas, overload or weak batteries can all cause later dropouts. Coordinate everything together and watch the receiver's indicators when the failure actually happens.
How can I tell an RF dropout from an audio problem?
Watch the receiver at the moment of failure. If the RF indicator drops along with the sound, the radio link is the likely cause. If the RF stays steady while the audio disappears or distorts, check the capsule, the transmitter's audio path, the output cable and the console input. Swap one part at a time to confirm.
Is it safe to buy a used wireless system online?
It can be, but verify before paying. Get the exact model number and band variant, and check them against the manufacturer's documentation and current FCC information for US use. Be wary of listings that omit frequency details or claim the gear works anywhere. Older units may tune to ranges that are no longer available to them.
Sources & further reading
Community discussions identify lived problems; they do not establish technical or legal requirements. Primary references support the specific claims cited above.
- R1 / COMMUNITY DISCUSSIONSignal interference/ audio dropouts ↗
- S1 / PRIMARY REFERENCEShure: Troubleshooting Wireless Dropouts ↗
- S2 / PRIMARY REFERENCEFCC DA 17-709: 600 MHz wireless microphone disclosure ↗